Introduction
This quick reference guide provides instructions for People2.0 Affiliates on how to handle the E-Verify Report for employees with incomplete Form I-9 or no E-Verify Case in the P20 Software. A complete Form I-9 along with an E-Verify Case is needed for DHS compliance.
This QRG contains the following sections:
Handling the E-Verify Report
Step 1: Reviewing the Report(s)
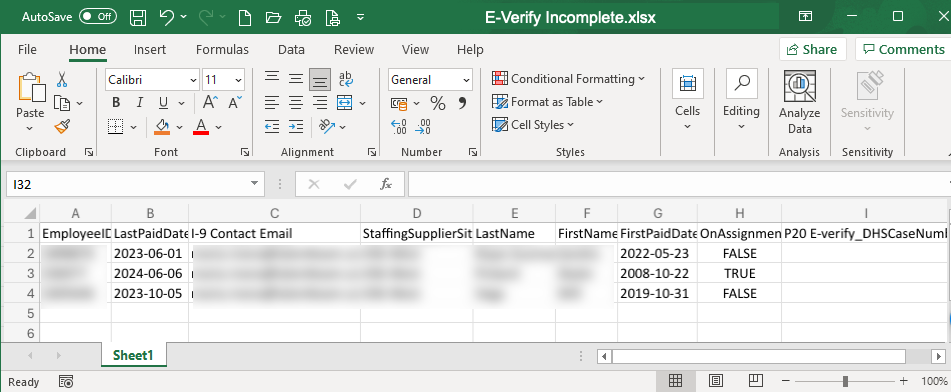
- Access the E-Verify Reports: Open the report(s) (I-9 Forms Incomplete and/or E-Verify Incomplete) provided by People 2.0, which lists employees with I-9 Forms Incomplete, or employees with no E-Verify case.
- Identify Affected Employees: Locate the employees in the P20 Software who require action based on the report.


Step 2: Completing Form I-9
- Employee Section 1:
- Ensure the employee completes Section 1 of Form I-9 with their personal information.
- The employee must sign and date the form, attesting under penalty of perjury that the information provided is true and correct.
- Details to complete this step, see Missing Form I-9 – Section 1
- Employer Section 2:
- As the employer or authorized representative, complete Section 2 by examining the documents presented by the employee.
- Attest, under penalty of perjury, that the documents appear to be genuine, relate to the employee, and to the best of your knowledge, the employee is authorized to work in the United States.
- Sign and date the form, including the employee’s first day of employment.
- Details to complete this step, see Missing Form I-9 – Section 2
- Uploaded Completed Form I-9:
- Ensure the completed Sections 1 and 2 of the Form I-9 are in the Hiring Center in the P20 Software.
Step 3: Create E-Verify Case
- Access the E-Verify Module:
- Navigate to the Hiring Center and select the E-Verify tab.
- Locate the employee record and select the 'Create New Case' button.

- Complete the E-Verify Case Wizard:
- Follow the steps in the wizard to enter the required information, including the Hire Date and Reason for Delay if applicable.
- Verify the pre-populated information from the employee record and Form I-9.

- Submit the Case:
- Submit the E-Verify case and record the case number.
- Monitor the case status for any further action required.
Step 4: Monitoring and Managing E-Verify Cases
- Case Status:
- Regularly check the status of the E-Verify case in the P20 Software for Case Results.
- Follow up on any Tentative Non-confirmation (TNC) or other issues that may arise. - Case Closure:
- Once the case is resolved, ensure it is properly closed in the E-Verify module.
Addressing Incomplete or Missing Form I-9 and E-Verify Case
Missing Form I-9 - Section 1
- Contact the Candidate:
- Contact the active or inactive candidate to have them complete Section 1 of Form I-9 immediately, using the original start date on Section 2. - Complete E-Verify Case:
- Once Section 1 is completed, proceed to complete an E-Verify case in the P20 Software.
Missing Form I-9 - Section 2
- Section 1 Completed before November 2023:
- A completely new Form I-9 (both Section 1 and Section 2) will be required using the 2023 version of the form.

- Section 1 Completed after November 2023:
- The candidate will need an Authorized Representative to complete Section 2. - Complete E-Verify Case:
- Once Section 2 is completed, proceed to complete an E-Verify case in the P20 Software.
Outstanding or Open E-Verify Case
- Review Open Case:
- If the candidate has an open case in the P20 Software, review it to see if any action is needed to close the case.

- Completion Based on Start Date:
- If the candidate’s start date is after the MOU E-Verify Contract date for your account, confirm this date with the People 2.0 HR Department at hr@people20.com.
E-Verify Form Utilized
- Check E-Verify Form:
- If an E-Verify form was added to the Hiring Center under Forms Needing Attention, be sure to complete the Ref/Cert # with the E-Verify Case #.

- Verify the E-Verify form.

- Add New E-Verify Form:
- If the E-Verify Form is missing, add a new E-Verify form to the Hiring Center, Verify the E-Verify form, and complete the Reference # information.
Questions?
For questions related to processing the Form I-9 in the P20 Software, please contact i9@people20.com
Was this article helpful?
That’s Great!
Thank you for your feedback
Sorry! We couldn't be helpful
Thank you for your feedback
Feedback sent
We appreciate your effort and will try to fix the article